How to Wash and Wax Your Car – Complete Guide
Affiliate Disclaimer: If you purchase via one of the links on this page we will receive a small commission from Amazon. This helps us keep doing what we love. Thank you!
Updated 10/15/2023
Hey Everyone!
Like many of you, I’ve been washing cars since I was a kid helping my parents wash our station wagon and mini vans. My parents used a tablespoon of dry powder, added it to a bucket of water, and called it good.
In this article, we’re going to step it up a notch. I’ll tell you that my current routine is subject to change.
Every time I wash one of my cars I keep a record of which products I used, how I layered them, etc. That gives me a way of “backtesting” to see which combinations perform the best.
Before you even start washing you car, you must answer an important questions.
- Do you want to strip any current wax off the car, or
- Do you want to maintain an existing wax finish?
In this guide I’ll breakdown my washing, sealant, and waxing routine.
Step 1. Deep Clean Car Wash (stripping old wax)
Once every 6-12 months (depending on how often I’m driving) I do a deep clean washing my car and stripping old wax to bring the car down to the paint and prepared to apply new sealants and waxes
When I’m ready to strip off old wax and go down the bare paint, I use a car wash product that has chemicals that strip old wax.
My preferred choice is Chemical Guys Citrus Wash.
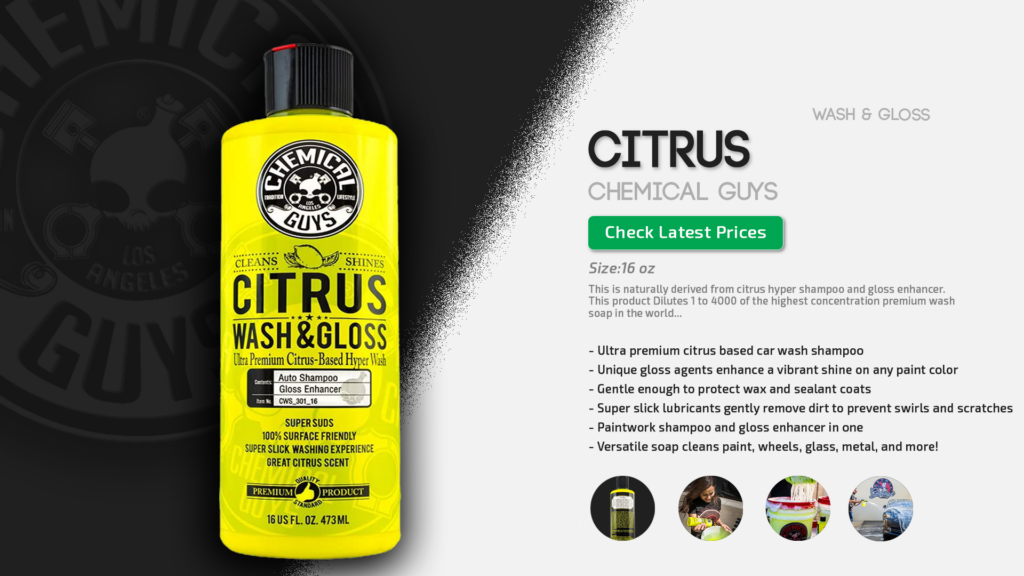
I’m most likely to use this wash to bring the car down the paint in the spring after the salt and grime has left the car needing a deep clean.
Generally a deep clean is going to be once every 3-4 months in severe driving environments or every 6-8mo in lower heat and dryer driving conditions.
While you certainly could simply wash with the Citrus Wash once or twice a month and have a relatively nice shine, it doesn’t give you the water beading action of sealants and wax, so for me, it’s just the beginning.
Additional Wax Removal Products
If you like to use Wolfgang products like I do, then you can use a Wolfgang Pre-Wax Enhancer.
This is a product that you apply with a foam pad or cloth sponge, it’s more labor intensive than a quick car wash with Citrus Wash, but you can rest assured that it will certainly remove any previous waxes or finishes.
Step 2. Clay Bar Your Car to Remove Impurities and Road Grime
After your Citrus wash, and before you apply any sealant or wax, you want to take this opportunity to remove impurities that are on the paint.
If you run your hand along the clean paint and feel little bumps, that’s an indicator you need to do the clay bar.
I use Chemical Guys Clay Bar and Clay Bar Lubricant. Dry clay bars will scuff the paint on your car, so the lubricant allows the clay bar to slide over the surface.
As it slides over the surface it picks up the impurities that have accumulated on the top layer of the paint.
On my white Range Rover during the winter I seem to pick up these little orange spots on the paint that is some type of oxidization between the salt and the paint.
The only way to get it off is to use the clay bar. An important reminder when you’re using the clay bar is to kneed it frequently and make sure the surface stays wet.
And, if you drop the bar on the ground, you have to ditch it. Unfortunately the dirt from the ground will immediately get into the clay bar and then will scuff your car.
Step 3. Apply Sealant
One of the awesome things about having a super clean car is having water bead off the surface.
When you have water beating off the surface, you can use a hose to lightly rinse off dirt and loose (non oily) grime and keep the car looking awesome for a long time. Achieving long lasting water beading requires a combination of sealants and waxes.
One of the biggest challenges I’ve had with keeping my cars looking good is that simply applying a carnauba wax after washing the car wouldn’t last more than a few weeks before the car needed to be washed again.
My current routine is to wash the car, clay bar trouble spots as needed (usually lower panels just behind the wheels and the front fender), and then apply the Wolfgang Deep Polish Paint Sealant.
I’ve tried using Chemical Guys sealants but they didn’t work as well as Wolfgang’s product.
The Deep Polish Paint Sealant by itself is supposed to last 3-4 months in more extreme weather and heavy driving 6-8 months lower heat and lower humidity/moisture driving conditions.
This product is a sealant that is applied with a foam pad. You want to apply a very thin layer. I let it dry to a nice haze which usually only takes 10-15 minutes. If you let it dry too much it will take more muscle to buff out with a microfiber cloth.
Now this is important. Sealants will look basically dry after you microfiber, but just like wet paint, it needs to fully dry to cure and bond with the paint surface. This takes a min of 12hrs.
If you have a garage, the car should be parked in the garage. Rain and even dew from overnight can hurt the curing process.
The following morning once the sealant is cured, you have two options. You can either call it done, or add a topping layer of wax.
Step 4. Topping Wax Layer for Your Car
When it comes to applying a top layer of wax, what this effectively does is adds a layer of protection over the sealant. It helps the sealant last longer.
However, if you apply a wax that has a cleaning agent in it, that cleaning agent will actually strip the current sealant and it defeats the purpose.
The best wax to apply in my experience is Collinite 845 wax. However, it’s not as long lasting if you drive in salt/snow.
It’s super easy to apply with a foam applicator, letting it dry to a haze, then buffing with a microfiber cloth.
Collinite 845 is a combination of a carnauba wax and a synthetic wax. The biggest drawback of using pure carnauba wax is that it really only lasts a few weeks under regular driving conditions.
It’s somewhat labor intensive to apply since you need to do the whole car by hand with a foam applicator, and them microfiber the whole car. So as a result I’m more inclined to use a synthetic wax or a combination like Collinite 845.
While it’s true that probably the perfect wet finish look would come from carnauba waxes, they are a true labor of love and there are more efficient ways to maintain a finish that performs equally well and looks great.
Step 5. Final Water Repellent Layer
This is really above and beyond, but the final step that I use is to apply a thin water repellent coating.
I’m currently using Starke Replenish Silica Spray.
This is used in the boating industry but can be equally applied to vehicles. It’s a silica spray, which means it applies a thin ceramic coating. This is very easy to apply with a spray on and microfiber buff.
This is an optional step that you could easily skip, but with a lot of rain in the northeast, I like the added water repellent.
Tips on Layering
Ultimately when washing, clay baring, applying sealants, waxes, and water repellent products, you are layering. The more layers you add, the better you protect the bottom layers including the paint and the sealant. If the sealant is well protected, you only need to reapply a few times a year.
You can think of the top layers as sacrificial layers. They will take the most abuse of bugs, dirt and road grime, and will get rinsed and scrubbed off a little bit when you wash the car or do touchups.
So after each car wash or waterless wash, adding another thin sacrificial layer with either waxes or water repellent coatings will help extend the life of your paint, sealant, and Collinite 845 layers.
Car Wash Soap that’s safe for Waxed Cars and won’t strip your Wax
After a long drive where I’ve picked up some road dirt and grime, the car is still repelling water but is looking like it could use some spot washes. There are two ways to go with this.
The first is to do a full wet wash. I use Wolfgang Auto Bath because it will NOT strip wax, unlike the Citrus Wash by Chemical Guys.
My routine is to do a Wolfgang Auto Bath, dry with microfiber, then apply Wolfgang Instant Detail Spray. This is a synthetic coating that can be applied at any time to extend the life of the Deep Gloss Sealant and other wax layers below it.
Wolfgang also offers a product called Fuzion Spray Wax. The Fuzion Spray Wax has carnauba which makes it a bit more like a traditional wax meaning it will take a bit longer to apply.
Both are good options, and could be used in rotation. One recommendation I’ve heard is to use multiple different products within a companies product line because different polymers and combinations of synthetic and carnauba will create a strong bond.
Waterless Car Wash (great for Uber, Lyft and bring your car to car shows!)
If you don’t have time to use Wolfgang’s autobath and do a full wet wash, a waterless wash works well.
You can use Wolfgang Instant Detail Spray as part of a waterless wash if you use it generously to wet down the area with road grime.
Another product that I use is Optimum Opti Clean Cleaner.
This will NOT strip wax, and will give a quick rinse when applied generously and then buffed with a microfiber to add another synesthetic protective layer.
I personally always keep a plain water filled spray bottle, a couple of microfiber towels, and Instant Detail Spray in my car. A quick fill up at the gas station and I can do a few touchups as needed.
Tire Kicker Tips: Microfiber Towel Management
Have a system for your microfiber towels. This is my system using 6 different colors.
To keep it simply I keep the products with their associated towels in a small storage container.
Green: For washing for car body and scrubbing grime and bugs but NOT for the wheels
Orange: Wheels only (not for the painted surfaced)
Bright Yellow: Sealant Layers
Light Blue: Wax
Blue: Windows (like Windex color)
Red: fluffy red microfiber for drying
From time to time we refer third-party products or services to you. We may receive compensation from those third parties whose products or services we refer, however, our reviews and recommendations are independent of any compensation we may receive. There is no obligation for you to interact or transact with these third parties.
